Showing posts with label sewing. Show all posts

Thursday, April 23, 2020

Face Masks for COVID-19

I haven't had a lot of smaller crochet projects completed in the last month, because I have been helping a local group make face masks for local organizations. I was recruited in the first few days of the group being created on Facebook, and I was asked to help pick a pattern for the group to make. I had to scour through dozens of patterns to pick the dimensions and types of fabric we would need to make the masks.


We settled on a basic 6"x9" rectangle to make a 3"x8" mask with elastic.
We had so much fabric being donated, I had to help cut so much material and two rolls of elastic (200 yards each!), to help make kits with everything washed, cut, and ready to sew. We decided that this was the most efficient way to get work done.


We had some people who could not sew, but they could cut. Others helped by washing new fabric we got to pre-shrink it. We accepted all the help we could get. I was assembling 20 kits each week, but not doing a lot of sewing myself. Sewing hurts my back... which is WHY I CROCHET!!!

These are some masks that I had to fix because the ties used were falling apart.


Later, we had a need for the more fitted mask design, so I searched the internet to find a good pattern that would fit our need, and there was a great one made by Craft Passion. I had to develop a 3rd pattern to modify our original rectangle design into a mask with a pocket for a filter.


THEN we had the need for ear savers! I know lots of people have been crocheting them, but my group needed a pattern so they could make their own with scraps. So I went to work researching the best size and made my own pattern tutorial!


I hope you have enjoyed these pattern designs. Please be sure to follow all the CDC guidelines for masks. Certain materials are better than others at filtering particles, and these masks in no way guarantee the prevention of contracting or transmitting a disease.


Thursday, November 2, 2017

Dressmaking with my Daughter

A few weeks ago I was getting some fabric at Joann's Fabric and Craft Store. They were having an amazing deal on quilting cotton fabrics and since I promised my daughter we would start quilting together, we went to go look at some fabrics.

As we were perusing through the aisles and different swatches of fabric, she found one that really caught her eye.

"Mom, I love this fabric. It would make a beautiful dress!"

Well, I had to get it for her! If she wanted to make a dress instead of a quilt, who am I to complain? It has been a while since I made a dress for my girls, so I figured we could put this one together.

We went to the pattern section to pick out a pattern. I knew that at home we only had patterns in smaller sizes, and she is about to turn 9. We flipped through the books and found out that Simplicity patterns were on sale for $.99! What great timing!!

We had picked out a couple but only one was in stock in the size we needed. So we picked that up, had our fabric cut, and went home!


First I cut out all of the pattern pieces and laid it out on the fabric. I had my daughter help trace the correct size onto the fabric, and she did most of the cutting.

I showed her how we follow the directions, starting with the stay stitching. We stitched all those pieces and started putting together the bodice. She kept getting SO excited as each piece was added and created a more finished look. I showed her how to iron everything flat.

Then, I put the sleeves on. Sleeves are one of those beasts that you just don't tackle at 8 years old. I had her watch me so she could see HOW it was done.

We started putting together the dress. I lined up the pieces and pinned them and she sewed them all together. She attached the dress to the bodice, but I had to do it one more time because her line was a little zig-zaggy. This line HAD to be straight.

We ironed the hem and I showed her how to do the first few feet. How you should hold your hands and help keep the fabric flat, how you should keep the stitches close to the edge so that it has a nice finished look. I was thoroughly impressed at how well she did this hem!


After that, all we had left was the zipper. I explained to her how that was done, and I sewed it in. After so much sewing experience, zippers don't scare me at all. I can even do it without the zipper foot and without pre-sewing the seam. I'm all about efficiency and speed!!

And this is how it all turned out! She was jumping and so excited to see how beautiful it turned out.


My daughter turns 9 this week and with how well this project went, I think we will be turning out more projects together! Do you enjoy crafting with your kids? Post a comment with a link to your projects!

Thursday, December 15, 2016

Buttercup Bags

I was given a bagful of beautiful fabrics from a friend who was trying to decrease her fabric load (like that's ever a real problem, right?!). I had a whole bunch of my own that I had kept for years, because I was waiting for the right project to use. Well, I finally found the right project for a bunch of my fabrics!! Here it is, free Buttercup purses from the free pattern by madebyrae


I very much love how the purse turned out, and the fabric pairing was quite lovely in my opinion! Her pattern is free, and comes with fairly easy to follow instructions. I decided to follow some of the recommendations given in the comments to increase the size of the bag. I did this by printing out the original pattern to 125% using Adobe Acrobat's poster printing feature.

I found the pattern to be so simple to make, I decided to make one for all my family and a few of my friends. Check out the fabrics I chose! Let me know in the comments which one is your favorite!!!


Thursday, February 28, 2013

My First Quilt

Okay, so I've finally gotten my first quilt stitched together. I've been working on this quilt for probably 2 years. The first year was spent collecting old/ too big jeans from freecycle and craigslist. Then I designed the quilt myself- It is just a simple brick pattern that I thought would work well with different colored denim. The majority of my time was spent cutting seams apart and then cutting the fabric strips to size.
It was a long process....
Sewing only took me about 2 hours to get it completely assembled. Not too bad for a newbie! I used a full sized sheet (So now you have an idea as to how big this thing is!) as the bottom layer, and an ugly blanket for the middle. I just stitched it together and I feel like the queen of quilts!!!


I know it's not the most amazing thing ever, and a lot of the seams are not lined up as they should (Hey, it was my FIRST quilt!), but I am SO PROUD of how it looks. My next job is to put a decorative stitch around the edge to give it a finished look. I think I want to do this by hand, and then add some decorative quilting in select "bricks" on top. I'm thinking about a handprint from all the family members, flowers, something cute and simple. Any ideas?

Oh, and the best part about this quilt- was that the materials were FREE!
- Old, oversized, craigslist, freecycle jeans (This quilt used approximately 15 pairs of adult jeans)
- Ugly old blanket for thickness/padding
- Sheet previously purchased as a couch cover for a couch no longer owned. ($6 from Walmart)
- Sewing materials I already have, thread, sewing machine, etc.

Love it!

If you were wondering why there was a dearth of posts on my blog, this treasure is why!

Thursday, November 10, 2011

PJ's for the Kiddos

I love going to Jo-ann's Fabric and Craft stores to search through the 50% off remnants of fabric. The other day I found perfect fabric for PJ's for the kids. It took me like 20 minutes to finish each, and about $1.50 in fabric each.

Monday, May 30, 2011

Jeans for the little ones

My daughter is in desperate need of shorts. It gets really hot here in Provo over summer (although it hasn't yet) and all she has are pants. I retrieved an old pair of women's jeans that someone was giving away for free because of tears around some seams. I took that and whipped up these two pairs of jeans.


What I looooove about making these for the kids is that I get the material for free, and I reuse a few seams from the original pair of jeans so that I don't have to work as hard! And I think they turn out pretty darn cute!

Friday, May 6, 2011

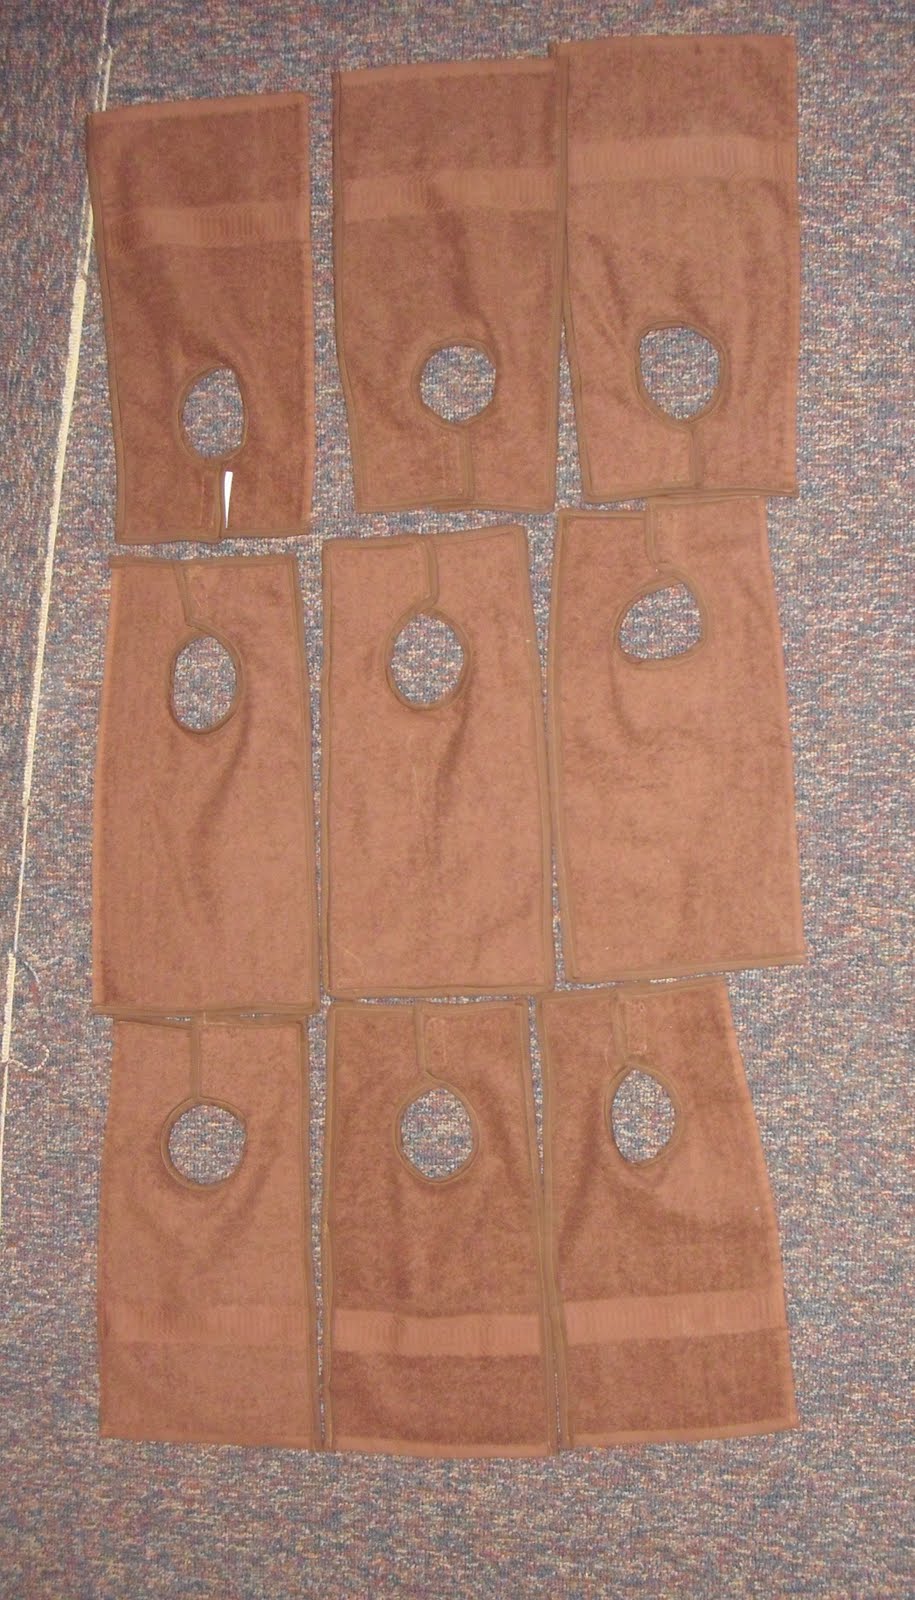
Towel Bibs

So, with the addition of my second child, we started running low on quality bibs. I made some towel bibs for my oldest when she was of eating age. Now that my second is of eating age, I needed to make some more.

Supplies:
1 big towel ($2)
30 feet of bias tape ($3, I made it myself)
velcro (1.50)

I cut the towel into 9 pieces, making each bib about 9.5" wide, and about 18" tall. I cut circles close to the top and used bias tape to seal all the cut edges. Then I added velcro to the edges above the circles.
Results: