Showing posts with label crafts. Show all posts

Monday, May 27, 2019

Crochet Heart Key Chains - FREE PATTERN

For Christmas this year, "Santa" gave us tickets to go to Disneyland! (All my kids now know the truth about Santa) So we went earlier this month, and the kids had A BLAST! While preping for our trip, I knew we would be spending A LOT of time in lines, so I wanted to bring something to do. Per usual, my husband brought a book to read to the kids while in line. My kids ADORE his book reading. And I do too! But I like to keep my hands busy, so I tried to think of what I could bring to crochet that would be easily portable, small, (NOT a C2C blanket) and fun to work on. So I got thinking....
I could make a bunch of hearts to make something small to give/sell at craft fairs this year... So I looked at a bunch of heart patterns and decided that I wanted one that could be done in ONE round, and petite enough to be a key chain. So I came up with this pattern! You should have seen me making these in the lines at Disneyland! I took a gallon size zip lock baggie and put a bunch of scraps in a variety of colors and kept it in my backpack. Then I would pick one color and stick the little ball into my pocket and work the crocheting in my hands while walking through the lines! I would snip the yarn after each heart and work on the next one, until I used up the whole strand of yarn. I had some old ladies commend me for my genius set up!


Then, after I got home I decided to add these cute little tails to the hearts that I made. The key rings that I ordered still haven't come in!


THEN, because you can't just stop at just a few colors, I had to make one in almost EVERY COLOR yarn I had. That included these beautiful rainbow colors! Go and make yourself a fun set!

Here is what they look like when finished!


Monday, May 13, 2019

Yarn Color Organizer - FREE TUTORIAL

As a designer, I try to use a wide variety of colors. There are only so many colors available in the yarn that I like to use. I had tried to just eyeball my design colors on screen, only to be disappointed when the color on screen didn't exactly match the yarn colors I was actually going to use. The design turns out so different!


Since I mainly use one brand when I design my Corner to Corner blankets, I decided to make a catalog of sorts so that 1) I could see what each color looked like IN REAL LIFE, and 2) I could easily see how much of it I have in stock (optional), and 3) where I could buy it if I needed more.

So this post is to explain how I put together this lovely organized binder to sort my yarn colors!

I started by comparing a few different websites and local stores to see which stores had what colors. I was surprised to see the differences in what yarn colors the stores like Michael's and Joann carried in stock. It is super helpful to see which yarns were easily accessible in-store, and which colors HAD to be ordered online, either from those two companies or other websites.

Click here to download the catalog!

When you click above, you will get the printable catalog I put together, complete with the Caron Simply Soft Solids available at the online stores at Michaels, Joann, Herrschners, Yarnspirations. When I go into my local store, I put a mark on the ones available in store (will vary based on your location). For this option, I also included an option for Walmart, since they have some options available (especially when I am desperate!)

What I did to put together my binder is print two copies of the catalog. I went into my local Joann, Michael's, and Walmart and filled out the local availability of each color. YOU ONLY NEED TO DO THIS ONCE! This has saved me SO MUCH TIME looking for which store would have the colors I need. I cut up one copy of the filled out catalog to make a little card for each color yarn and slid them into a trading card holder plastic binder sheet. I put the second copy of the catalog in page protectors in the back. This was just for easy reference and quicker lookup without the bulk.

*Disclosure: This post may contain affiliate links. If you purchase an item through one of the links on this site, I may receive a small percentage of that sale at no additional cost to you. See my full disclosure policy.Thank you for helping support this blog!

Get some Trading Card Binder Sheets

Cutting the "cards"


Then, since I wanted to have a REAL sample of the yarn color, I bought some embroidery yarn bobbins to hold the yarn. For this project, I needed two of these 28-packs to have enough for all the yarn colors.

Get your Embroidery Yarn Bobbins

I took about a yard from each color and wound it around the little bobbin neatly. You need it to be as flat as possible so that they don't fall out of the little pouch, and so it doesn't make the binder excessively bulky.

Winding up bobbins


After cutting the yarn and tucking in the tail, you just slip the coordinating color into the right pouch for that color.

Slide bobbin in place

And as you do that for EVERY COLOR, you get a beautiful, gorgeous spread of all your color choices!

I found it to interesting to see how well some of the printed colors matched the yarn.... or didn't! This is exactly why I put together this binder. I needed to be able to see the TRUE colors to match them up in my designs more accurately. Screens and printers create so much variation that I just HAD to have the actual yarn available to refer to. This was the perfect solution!

I hope that you have found this tutorial helpful!

Friday, November 2, 2018

Flower Burst C2C Blanket - FREE GRAPH

So far, I've been posting a lot of geometric C2C patterns. I wanted to take a quick break and share something floral and beautiful! But don't worry, I have some more geometric patterns to release!

Check out my newest pattern: Flower Burst!


Thursday, September 13, 2018

Triangle C2C Blanket - Free Graph

Ever since I discovered corner to corner crochet, I have not been able to stop designing things! I love this thing!

It started with the Unicorn C2C blanket crochet along, then I designed the Herringbone C2C blanket, and now I'm introducing the Triangles blanket! 

I designed this blanket with my son in mind. He loves the color red, and there are shockingly very few "boy friendly" crochet patterns out there. My little nephew had a quilted blanket made from triangles, and I thought, I could make this out of C2C! So I went and designed this Triangle Blanket!


Monday, July 16, 2018

Flat Boutique Bows

It has been 4+ years since I made hair bows for my girls. They were starting to outgrow the ones I had made using 5/8" ribbon. I was looking for a tutorial for a nice and simple bow. I don't like ones with twisties and loopies. Just a plain. regular. bow.

And I stumbled on this video!

https://www.youtube.com/watch?v=uHRgrc-C6g8

You can get to the written out, photo tutorial here:
http://www.modernbohemianlifestyle.com/2013/03/how-to-make-hair-bow.html

This was exactly what I was looking for! The best part, was that the ends of the ribbon do not show, so when you melt the ends, it's not a big deal if the ribbon turns black from the flame. I had that issue with my last bows and it took me FOREVER to get all those ends sealed.

With this set, I purchased the 1.5" ribbon as a lot on EBAY
I also purchased a similar lot from the same seller for 1/4" ribbon to use for the center. I saved A LOT of money vs. getting each color from the craft store. With 1 yard of ribbon, I could make two bows in each color, and that was perfect for me! The price comes out to be $.18 per bow. 18 CENTS! What a deal.
I also use alligator clips from Sally Beauty Supply. I was always disappointed in quality when I bought in bulk on ETSY. I love these clips! (they don't have them on their website, but I always find them there when I go into the store)

Anyway, I followed the tutorial and with my ribbon purchase I was able to make 50 new bows for my girls in beautiful colors!

It took me a few days to make all the bows, so I have a second photo but I think I grabbed duplicates, oh well. I promise I made 50. ;)


I just LOVE the size of these bows. They are perfect for my girls and exactly what I wanted to make. So go ahead and make some!


Thursday, May 24, 2018

Flower Puddles Blanket - Genie

I couldn't help myself and I made another blanket using the Lion Brand Mandala Yarn. You can read where I got the pattern in my original post: Flower Puddles Blanket.


*Disclosure: This post may contain affiliate links. If you purchase an item through one of the links on this site, I may receive a small percentage of that sale. See my full disclosure policy.Thank you for helping support this blog!


I love the edgy feel that this blanket has. It is very different from the other two I made from Mandala Yarn, that were both a rainbow color scheme. I used two skeins of the yarn called Genie with one skein of Caron Simply Soft in White.


The colors worked in rounds perfectly. My technique of blending the two strands of Mandala yarn at just the right moment makes for a perfectly blended blanket.


I simply adore this pattern. The ripples really stand out and the striking colors make it look so bold!


The flower edging is one of my favorite features of this blanket. The colors happened to work in my favor and ended with a nice solid colored edge. It puts a clean finish on this blanket.


If you love grays, whites, and teals, you should consider purchasing this blanket from my Etsy shop! Or you can custom order a blanket just like this using a different blend of Mandala yarn!


Thursday, November 2, 2017

Dressmaking with my Daughter

A few weeks ago I was getting some fabric at Joann's Fabric and Craft Store. They were having an amazing deal on quilting cotton fabrics and since I promised my daughter we would start quilting together, we went to go look at some fabrics.

As we were perusing through the aisles and different swatches of fabric, she found one that really caught her eye.

"Mom, I love this fabric. It would make a beautiful dress!"

Well, I had to get it for her! If she wanted to make a dress instead of a quilt, who am I to complain? It has been a while since I made a dress for my girls, so I figured we could put this one together.

We went to the pattern section to pick out a pattern. I knew that at home we only had patterns in smaller sizes, and she is about to turn 9. We flipped through the books and found out that Simplicity patterns were on sale for $.99! What great timing!!

We had picked out a couple but only one was in stock in the size we needed. So we picked that up, had our fabric cut, and went home!


First I cut out all of the pattern pieces and laid it out on the fabric. I had my daughter help trace the correct size onto the fabric, and she did most of the cutting.

I showed her how we follow the directions, starting with the stay stitching. We stitched all those pieces and started putting together the bodice. She kept getting SO excited as each piece was added and created a more finished look. I showed her how to iron everything flat.

Then, I put the sleeves on. Sleeves are one of those beasts that you just don't tackle at 8 years old. I had her watch me so she could see HOW it was done.

We started putting together the dress. I lined up the pieces and pinned them and she sewed them all together. She attached the dress to the bodice, but I had to do it one more time because her line was a little zig-zaggy. This line HAD to be straight.

We ironed the hem and I showed her how to do the first few feet. How you should hold your hands and help keep the fabric flat, how you should keep the stitches close to the edge so that it has a nice finished look. I was thoroughly impressed at how well she did this hem!


After that, all we had left was the zipper. I explained to her how that was done, and I sewed it in. After so much sewing experience, zippers don't scare me at all. I can even do it without the zipper foot and without pre-sewing the seam. I'm all about efficiency and speed!!

And this is how it all turned out! She was jumping and so excited to see how beautiful it turned out.


My daughter turns 9 this week and with how well this project went, I think we will be turning out more projects together! Do you enjoy crafting with your kids? Post a comment with a link to your projects!

Thursday, June 15, 2017

Crochet Feather Headbands

I got a batch of photos from a photographer friend of some headbands I made from my feather crochet patterns. My friend Alicia Hubbs of Hubbs Home Photography took these fantastic photos! Check out how they turned out!

I made the crochet peacock feather, stitched and glue them together, and put a felt backing with room for a headband to fit through. This makes the headband interchangeable, if you're going for a specific look.

I didn't even think of doing this! Last year I put the feathers on a barrette and shared that photo on Facebook. This would have been much easier! Just wrap the headband around the bun to add a beautiful touch!

  
Aren't they just lovely!!


I also made some beautiful Feather Headpieces and added some felt backing with room for a headband. I actually made it possible to wear this piece in two directions, this one has the feathers sideways parallel with the headband.

This is what it looks like if you put it perpendicular to the headband. Also another beautiful look! 


Once again, you can wrap the headband around a bun to style it up! I just loved how beautiful all these photos turned out, and I love seeing my pieces being worn and loved!

Happy Crocheting!

Thursday, June 1, 2017

June Scarf Donation

I am excited to share with you the news that I have another delivery of scarves ready to go! I made 5 scarves and I am almost caught up on orders made from the purchase of PDF pattern compilation.

I thoroughly enjoy being able to try out new patterns and make beautiful products that I know will be loved. These scarves get donated to the Handmade Especially for You charity that donates these handmade items to women's shelters in my area. These items are loved and cherished because many times the women leave everything behind.

I appreciate your help and support through donations, visits, etc that makes these efforts possible.


Monday, April 10, 2017

Easter Egg Cozies

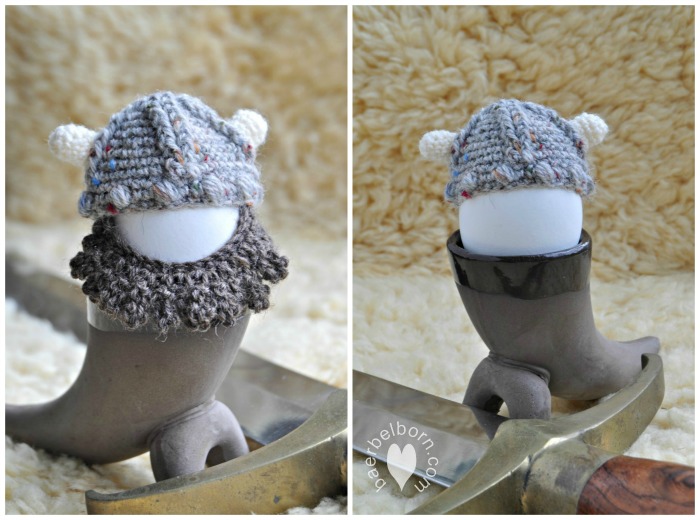
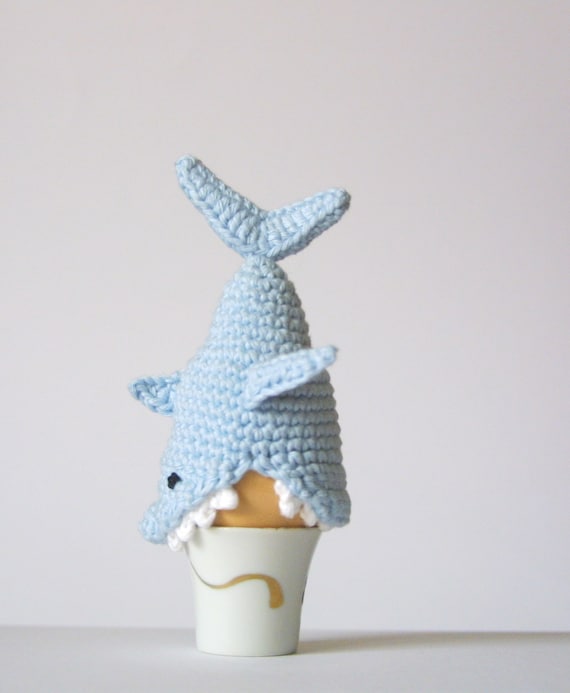
Okay. Seriously. I had no idea these were a thing. EGG COZIES! EGG BEANIES! I just fall in love with anything miniature! This Easter, you should make some of these to add to your decor! Click on the picture to link to the pattern.


Uova con cappellino a uncinetto

Easter cosies


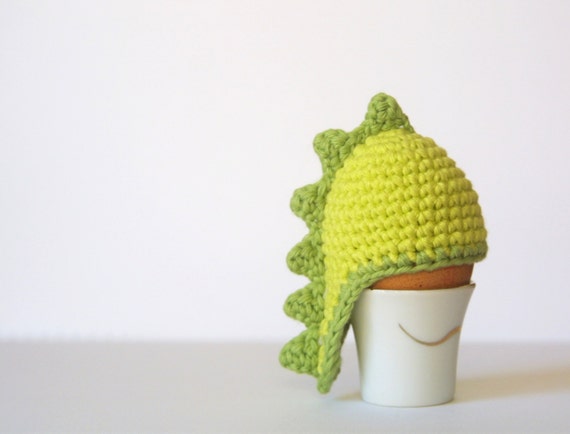
I also found these less Eastery-Themed egg cozies that I just LOVED and had to share!

Dino Egg Cozy, Egg Cozy Crochet Pattern, PDF,  Easter, Instant Download,


http://www.ravelry.com/patterns/library/minnie-and-mickey---egg-warmers


Which egg cozy/beanie is your favorite?!

Thursday, March 9, 2017

Crochet Feather Headpiece - Free Pattern

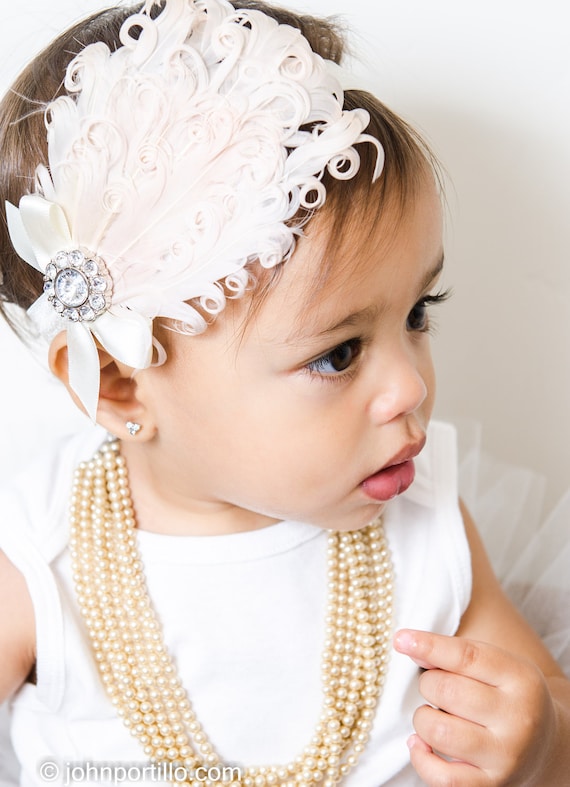
As many of you might have figured out, I'm a huge fan of Pinterest. I love all Pinteresting things! One of the things that I have loved are these beautiful feather headpieces that babies wear. I love the colors, the style and how adorable they look:

Old Hollywood Feather Headband Black and White - I know this is meant for little girls but it would look awesome with the black and white dress I love.:


how pretty!?!:


Black  Nagorie Feather headband, Feather baby pheadband with rhinestoe cluster and satin bow


Love that blue! So pretty:

As you can see, these are SUPER SUPER cute, and I thought there had to be some cute replica crochet pattern for a nice, dainty feather looking applique, but... I could not find one! So I made up one after playing with several designs, and I decided to settle with a variation of the Irish Leaf traditional crochet pattern with some variations and some different options for sizes and "fluffiness".


This is the regular sized applique suited for children to adults depending on the style you're aiming for.

This is the large applique. This is to replicate the look of the photographs I found on Pinterest. I found a super cute medallion at Michael's Craft Store to embellish these headpieces.

This is the small applique. This was designed for newborns or young children. 

*Disclosure: This post may contain affiliate links. If you purchase an item through one of the links on this site, I may receive a small percentage of that sale. See my full disclosure policy. Thank you for helping support this blog!


In my design making, I created several options:

Small, Medium, Large sizes
Regular ends or extra fluffy ends


Materials: 
Size G Hook (this is the set I use)
Worsted Weight Yarn (I use Caron’s Simply Soft Yarn: Pink, Robin's Egg, Ocean, White) 
Yarn Needle 
Scissors 

Gauge: Using G hook and materials listed the large feathers should measure approximately 5” tall and 2.5” wide, medium feathers should measure approximately 4” tall and 2.5” wide, small feathers should measure approximately 3” tall and 2” wide,

Here is the pattern for the different ends. Refer to these when you get to the part of the pattern where it says to complete turning end of choice [regular or extra fluffy]. If you find that this is a little too tricky, or are having trouble with this pattern, feel free to purchase my collection of tutorials for this feather headpiece on Etsy.

Regular Ends pattern: At the end of each row starting in row 2, complete the following to turn the work: ch 3, turn and work in back loops of the sc stitches.
Extra Fluffy Ends pattern: At the end of each row starting in row 2, complete the following to turn the work: ch 4, sl st in 2nd ch from hk, sc2tog in last two chs. Turn and work in back loops of the sc stitches. 


Small Feather Applique:

Foundation chain: ch 6

Row 1: sc in 2nd ch from hk, 1 sc in next 3 sts, sc 4 in last ch, turn slightly to continue working on the bottom of the foundation chain, and sc in each st across.
Row 2: [Working in back loops only from this point forward] ch 3, and sc to the first sc on the opposite side of row 1, working clockwise, and sc in the next two sts. Complete turning end of choice [regular or extra fluffy], 1 sc in each sc across, and (1 sc, ch3, 1 sc) in the ch-3 sp, 1 sc in next 3 sc, complete turning end of choice [regular or extra fluffy], 1 sc in each sc back to the ch-3 sp. [one point on each side of feather completed]
Row 3: (1 sc, ch 3, 1 sc) in the ch-3 sp, 1 sc in next 3 sc, complete turning end of choice [regular or extra fluffy], 1 sc in each sc back to the ch-3 sp, (1 sc, ch 3, 1 sc) in the ch-3 sp, 1 sc in next 3 sc, complete turning end of choice [regular or extra fluffy], 1 sc in each sc back to the ch-3 sp.[two points on each side of feather completed]
Row 4-5: Repeat row 3 to create 4 points on each side of the feather to complete the applique. Finish off with a sc in the ch-3 sp, and fasten off. Weave in ends.


Medium Feather Applique:

Foundation chain: ch 8

Row 1: sc in 2nd ch from hk, 1 sc in next 5 sts, sc 4 in last ch, turn slightly to continue working on the bottom of the foundation chain, and sc in each st across.
Row 2: [Working in back loops only from this point forward] ch 3, and sc to the first sc on the opposite side of row 1, working clockwise, and sc in the next 4 sts. Complete turning end of choice [regular or extra fluffy], 1 sc in each sc across, and (1 sc, ch3, 1 sc) in the ch-3 sp, 1 sc in next 5 sc, complete turning end of choice [regular or extra fluffy], 1 sc in each sc back to the ch-3 sp. [one point on each side of feather completed]
Row 3: (1 sc, ch 3, 1 sc) in the ch-3 sp, 1 sc in next 5 sc, complete turning end of choice [regular or extra fluffy], 1 sc in each sc back to the ch-3 sp, (1 sc, ch 3, 1 sc) in the ch-3 sp, 1 sc in next 5 sc, complete turning end of choice [regular or extra fluffy], 1 sc in each sc back to the ch-3 sp.[two points on each side of feather completed]
Row 4-5: Repeat row 3 to create 4 points on each side of the feather to complete the applique. Finish off with a sc in the ch-3 sp, and fasten off. Weave in ends.


Large Feather Applique:


Foundation chain: ch 8
Row 1: sc in 2nd ch from hk, 1 sc in next 5 sts, sc 4 in last ch, turn slightly to continue working on the bottom of the foundation chain, and sc in each st across.
Row 2: [Working in back loops only from this point forward] ch 3, and sc to the first sc on the opposite side of row 1, working clockwise, and sc in the next 4 sts. Complete turning end of choice [regular or extra fluffy], 1 sc in each sc across, and (1 sc, ch3, 1 sc) in the ch-3 sp, 1 sc in next 5 sc, complete turning end of choice [regular or extra fluffy], 1 sc in each sc back to the ch-3 sp. [one point on each side of feather completed]
Row 3: (1 sc, ch 3, 1 sc) in the ch-3 sp, 1 sc in next 5 sc, complete turning end of choice [regular or extra fluffy], 1 sc in each sc back to the ch-3 sp, (1 sc, ch 3, 1 sc) in the ch-3 sp, 1 sc in next 5 sc, complete turning end of choice [regular or extra fluffy], 1 sc in each sc back to the ch-3 sp.[two points on each side of feather completed]
Row 4-5: Repeat row 3 to create 4 points on each side of the feather.
Row 6: (1 sc, ch 3, 1 sc) in the ch-3 sp, 1 sc in next 4 sc, complete turning end of choice [regular or extra fluffy], 1 sc in each sc back to the ch-3 sp, (1 sc, ch 3, 1 sc) in the ch-3 sp, 1 sc in next 4 sc, complete turning end of choice [regular or extra fluffy], 1 sc in each sc back to the ch-3 sp.[two points on each side of feather completed]
Row 7: (1 sc, ch 3, 1 sc) in the ch-3 sp, 1 sc in next 3 sc, complete turning end of choice [regular or extra fluffy], 1 sc in each sc back to the ch-3 sp, (1 sc, ch 3, 1 sc) in the ch-3 sp, 1 sc in next 3 sc, complete turning end of choice [regular or extra fluffy], 1 sc in each sc back to the ch-3 sp.[two points on each side of feather completed]. Finish off with a sc in the ch-3 sp, and fasten off. Weave in ends.

I hope you enjoyed this pattern! Please share with your friends! Come back and share your photos of your finished projects. I love seeing the creativity of my followers as they "live the craft life". 

If you are struggling with the pattern I would recommend you purchase the PDF tutorial on Etsy. It has dozens of pictures for each size and walks you through each step.