Showing posts with label holiday. Show all posts

Tuesday, December 29, 2020

Plaid Stripe C2C Blanket - FREE GRAPH

 Here is the follow up to the last post's design. This is the accompanying design to the plaid blanket. This one features more white in the design, and has thinner stripes in addition to the big bold plaid stripes. I hope you enjoy this design!


Monday, December 14, 2020

Plaid C2C Blanket - FREE GRAPH

In November I published my first scarf design EVER and it was a HUGE hit! People loved it so much that I got a lot of messages asking to make a blanket version of that scarf. So here is the first of the two plaid blanket patterns for you!


Friday, October 30, 2020

Spider Web C2C Blanket - FREE GRAPH

Here is one more spooky design for Halloween! This one is a full spider's web. Don't you hate the feeling of a spider's web on your body? It's the worst when it happens unexpectedly while you are leaving your house for work. Right? With this design you can spook someone with a Spider Web Blanket!


Wednesday, October 28, 2020

Dangling Spider C2C Blanket - FREE GRAPH

Here is the next 2020 Halloween design! Spiders are super spooky and are a part of many Halloween decorations. You know, those awful spider web stringy fluff that kids make you set up all over your house? I only hope it doesn't invite REAL spiders!! Here you can spook with this spider Halloween themed blanket, Dangling spider!


Monday, October 26, 2020

Moonlight Cat C2C Blanket - FREE GRAPH

I had some awesome ideas for some new Halloween designs, and I'm super excited to share them with you! This design is called Moonlight Cat! It's not strictly Halloween themed, but it features a spooky cat under a full moon light. I really love how it turned out, I hope you like it!


Thursday, February 6, 2020

"The One" Heart C2C Blanket - FREE GRAPH

Okay, Valentine's day is just around the corner. That means LOVE is in the air! Everyone is thinking about what to get for their loved ones... chocolate, flowers... or maybe a crochet blanket! Not only is this design great for Valentine's day, but it can be made as a baby blanket for any friend or family member! Hearts don't only mean romantic love, but also mean friendship love, familial love, and really, it should just be human love. This is why I named this blanket "The One" Heart Blanket... because it goes out to the ONE who has your heart, be it a lover, child, grandchild, or friend. I hope you enjoy this design!


Monday, December 2, 2019

Snowy Tree C2C Blanket - FREE GRAPH

My friends! Were you hit with tons of snow this last Thanksgiving week? I live in San Diego, so where we live we only had to endure a chilly 50 degree high on Thanksgiving Day. It was tough, but we survived! HAHA! I know cities in the mountains here got lots of snow. I can't really handle the cold, so I stay home wrapped up in my warm blanket and crochet!
This new design was a fun one to put together in honor of this last week's snowfall. Introducing the Snowy Tree C2C blanket!


Tuesday, November 26, 2019

Crochet Christmas Tree - FREE PATTERN LINKS

Okay, so I am prepping for my first ever market, and I wanted to make some kind of festive home decor to go with my other accessories I'll have for sale. So I looked up on Pinterest to find some cute Christmas tree designs, and found a few free patterns for this Bobble Christmas Tree!

This is a free video I originally encountered. What a great tutorial to help you make the tree!


This video uses bobbles, and makes a separate bottom piece that you attach at the end.


Here you can find the link to a free pattern by the Simply Crochet Magazine in the UK. The pattern is written in UK terms, so if you are a US crocheter, like myself, then dc is a single crochet, and tr is a double crochet. This pattern also uses popcorn stitches instead of bobbles. Other than that, the pattern is very easy to follow... except that it is a hollow tree. So I did some modifications to extend the pattern to make a larger tree and close the bottom.

This is how mine turned out:

Don't you think they look lovely! Here are the instructions to make ones like mine!

*Disclosure: This post may contain affiliate links. If you purchase an item through one of the links on this site, I may receive a small percentage of that sale at no additional cost to you. See my full disclosure policy.Thank you for helping support this blog!


Materials needed to complete the blanket:
Gauge:
Gauge not essential, but my trees turned out 5" and 8" respectively.

Instructions:
Using TWO STRANDS of Caron Simply Soft Yarn and the size J Hook, use a magic loop to begin.
Mini Tree:
Following the instructions from the Mini Christmas Tree Pattern, complete the tree.
To close the tree:
Round 1: ch 2, *DC2TOG, 1 DC. Repeat from *around. Slst to top of first dc2tog.
Fill the tree with Fiberfill
Round 2: ch 2, DC2TOG around. Slst to top of first dc2tog. Pull out tail and weave the hole closed.

Large Tree:
Following the instruction from the Mini Christmas Tree Pattern, follow the pattern and continue for 3 more rounds:
Round 13 Work as given for Round 3. [14 popcorn sts, 14 dc]
Round 14 Ch1, (sc in each of next 6 sts, 2sc in next st) around, ss to the first sc.
Round 15 Work as given for Round 3. [16 popcorn sts, 16 dc]
To close the tree:
Round 1: ch 2, *DC2TOG, 1 DC. Repeat from *around. Slst to top of first dc2tog.
Fill the tree with Fiberfill
Round 2: ch 2, DC2TOG around. Slst to top of first dc2tog.
Round 3: ch 1, SC2TOG around. Pull out tail and weave the hole closed.


Wednesday, October 16, 2019

Jack o' Lantern C2C Blanket - FREE GRAPH

There is one part of Halloween that my kids are the most excited about... and that is Jack o' Lanterns! They love carving out the pumpkins and putting in a spooky (or silly) face in the pumpkin. I wanted to make a blanket with a creepy take on the classic Jack o' Lantern... and maybe next year all my designs will be Halloween cutesy! Here is the creepy blanket design:

Friday, October 11, 2019

Spooky Graveyard C2C Blanket - FREE GRAPH

Here is the second design in my Halloween themed blankets. This is a Spooky Graveyard scene, complete with a zombie hand emerging from the ground. How rad is this blanket? It's sure to give creeps and shivers to all who wear it! With an added bonus that it keeps you warm!


Tuesday, October 8, 2019

Halloween Haunted House C2C Blanket - FREE GRAPH

You guys. I have been DYING to do these Halloween themed blankets. I ended up terribly busy at the end of September, so I didn't get to publish these as soon as I had originally wanted. Life certainly does that to you. But here you go, the first of my Halloween themed blankets. This is my Halloween Haunted House C2C Blanket, which is so fun because it has a gorgeous full moon, bats, gravestones, and a creepy haunted house!


Thursday, June 29, 2017

Waving American Flag - Free Crochet Pattern

This year I wanted to create a cute, patriotic pattern to celebrate the 4th of July. After looking at some patterns that were already out there, I decided on this concept of a waving flag, not just the flat, motionless two dimensional flag. I wanted to give it some texture and some life! So here is the pattern I came up with!


*Disclosure: This post may contain affiliate links. If you purchase an item through one of the links on this site, I may receive a small percentage of that sale. See my full disclosure policy. Thank you for helping support this blog!

Materials:
Size H hook (this is the set I use)
Worsted Weight Yarn (I used: Caron Simply Soft in Red, Caron Simply Soft in White, and Caron Simply Soft in Royal Blue)
Sewing Needle

Gauge:
With materials listed the flag will end up being about 6" x 4"


Notes:
SC2TOG: insert the hook into the first stitch, yarn over, and draw the yarn through the stitch, insert the hook into the second stitch, yarn over, and draw the yarn through the stitch, then yarn over, and draw through the three loops on the hook.
COLOR CHANGES: The American flag alternates between red and white rows. I have written the pattern so that you do not have to cut the blue yarn between each row. Before attaching the new color, take the end of the blue yarn and put it to the back. This way it will be ready where it needs to be when you are ready to pick it up again.
ROW 1 TIP: If you want to make the bottom row of red not as large as the rest, try doing your single crochet stitches in the top two loops of the foundation chain.


Pattern:
Foundation: IN RED, Ch 27
Row 1: in RED, sc2tog in the 2nd and 3rd ch from hook, 1 sc in next two chs, 2 sc in next ch, *1 sc in the next 3 chs, sc2tog, 1 sc in next 3 chs, 2 sc in the next ch, repeat from * once, then 1 sc in the next 3 stitches. Fasten off and change to white
Row 2: in WHITE, ch 1, Working in the front loops only, sc2tog in the first two stitches, 1 sc in the next two sts, 2 sc in the next st, *1 sc in next 3 sts, sc2tog, 1 sc in next 3 sts, 2 sc in the next st, repeat from * once, then 1 sc in the next 3 stitches. Fasten off and change to Red
Row 3: in RED ch 1, Working in the back loops only, sc2tog in the first two stitches, 1 sc in the next two sts, 2 sc in the next st, *1 sc in next 3 sts, sc2tog, 1 sc in next 3 sts, 2 sc in the next st, repeat from * once, then 1 sc in the next 3 stitches. Fasten off and change to White
Row 4: in WHITE repeat row 2
Row 5: in RED repeat row 3
Row 6: in WHITE repeat row 2
Row 7: in RED, ch 1, Working in the back loops only, sc2tog in the first two stitches, 1 sc in the next two sts, 2 sc in the next st, 1 sc in next 3 sts, sc2tog, 1 sc in next 3 sts, 2 sc in the next st, 1 sc in the next 2 sts, then COLOR CHANGE TO BLUE, 1 sc in next st, sc2tog, 1 sc in next 3 sts, 2 sc in the next st, 1 sc in the next 3 stitches.
Row 8: CONTINUE BLUE:  ch 1, Working in the front loops only, sc2tog in the first two stitches, 1 sc in the next two sts, 2 sc in the next st, 1 sc in next 3 sts, sc2tog, DROP BLUE (do not cut) CHANGE TO WHITE, 1 sc in next 3 sts, 2 sc in the next st, 1 sc in next 3 sts, sc2tog, 1 sc in next 3 sts, 2 sc in the next st, 1 sc in the next 3 stitches. Fasten off and change to Red
Row 9: in RED, repeat row 7
Row 10: CONTINUE BLUE, repeat row 8
Row 11: In RED, repeat row 7
Row 12: CONTINUE BLUE, repeat row 8
Row 13: In RED, repeat row 7
Fasten off, and weave in all the ends.

With WHITE, use a sewing needle to stitch any number of stars you want onto the blue portion of the flag. I used cross stitching techniques to put x's on every other single crochet stitch in the blue section, and staggered the rows.

Attach the applique to any bag, outfit, or decor to give it a patriotic flair!

Monday, April 10, 2017

Easter Egg Cozies

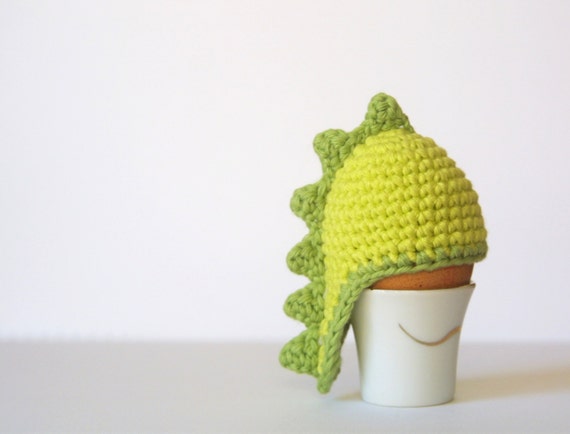
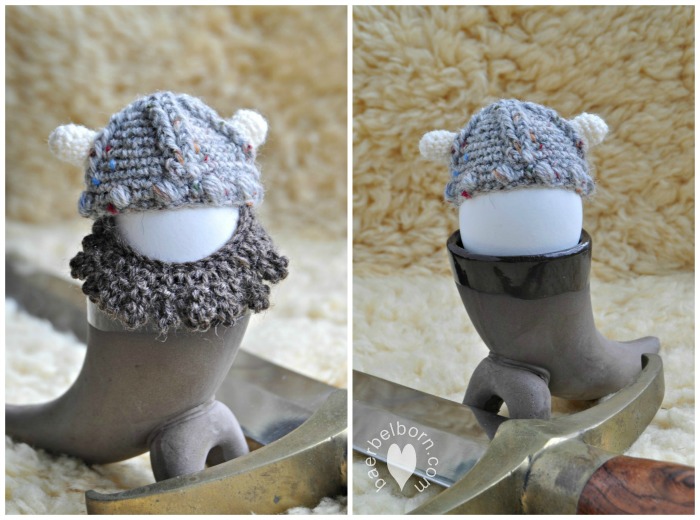
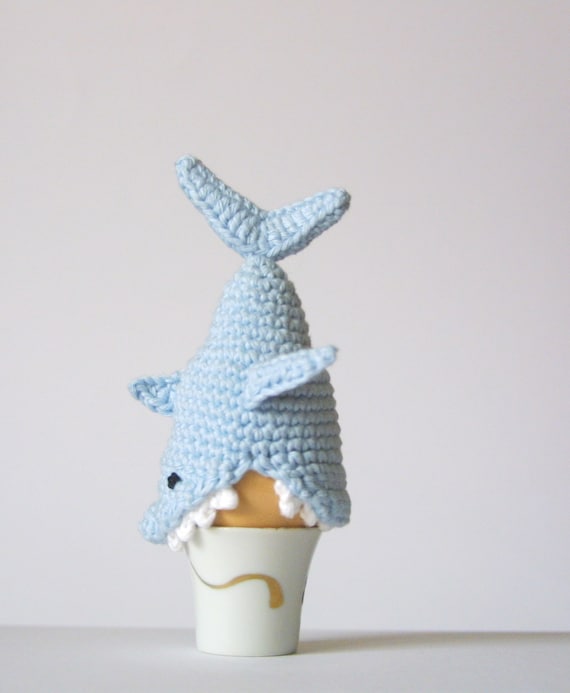
Okay. Seriously. I had no idea these were a thing. EGG COZIES! EGG BEANIES! I just fall in love with anything miniature! This Easter, you should make some of these to add to your decor! Click on the picture to link to the pattern.


Uova con cappellino a uncinetto

Easter cosies


I also found these less Eastery-Themed egg cozies that I just LOVED and had to share!

Dino Egg Cozy, Egg Cozy Crochet Pattern, PDF,  Easter, Instant Download,


http://www.ravelry.com/patterns/library/minnie-and-mickey---egg-warmers


Which egg cozy/beanie is your favorite?!

Thursday, March 17, 2016

Shamrock Garland

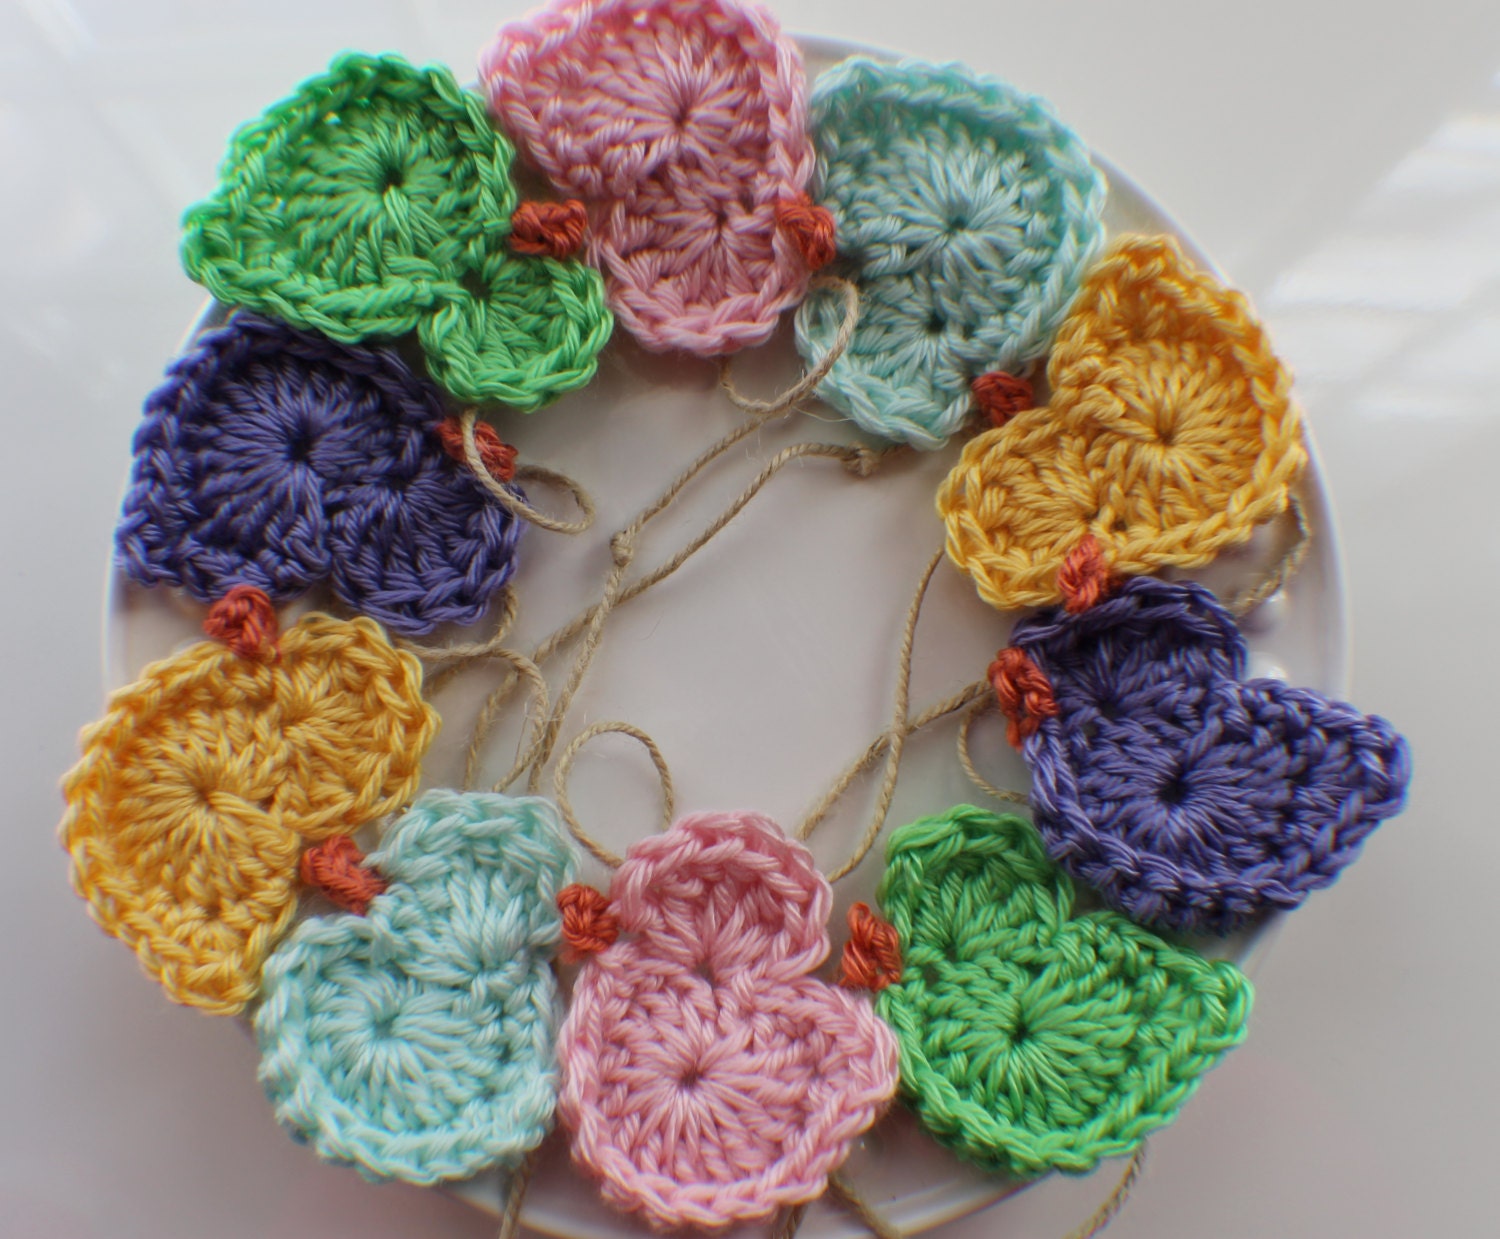
Happy St. Patrick's Day everyone! To celebrate this festive occasion, I made a garland of shamrocks to decorate! I used the pattern located here: http://www.skiptomylou.org/crochet-shamrock-garland/


 Except I used a string instead of crocheting the garland string.


Make your own if you want!
 
Happy Crafting!

Friday, April 18, 2014

April Feature: Easter Garland

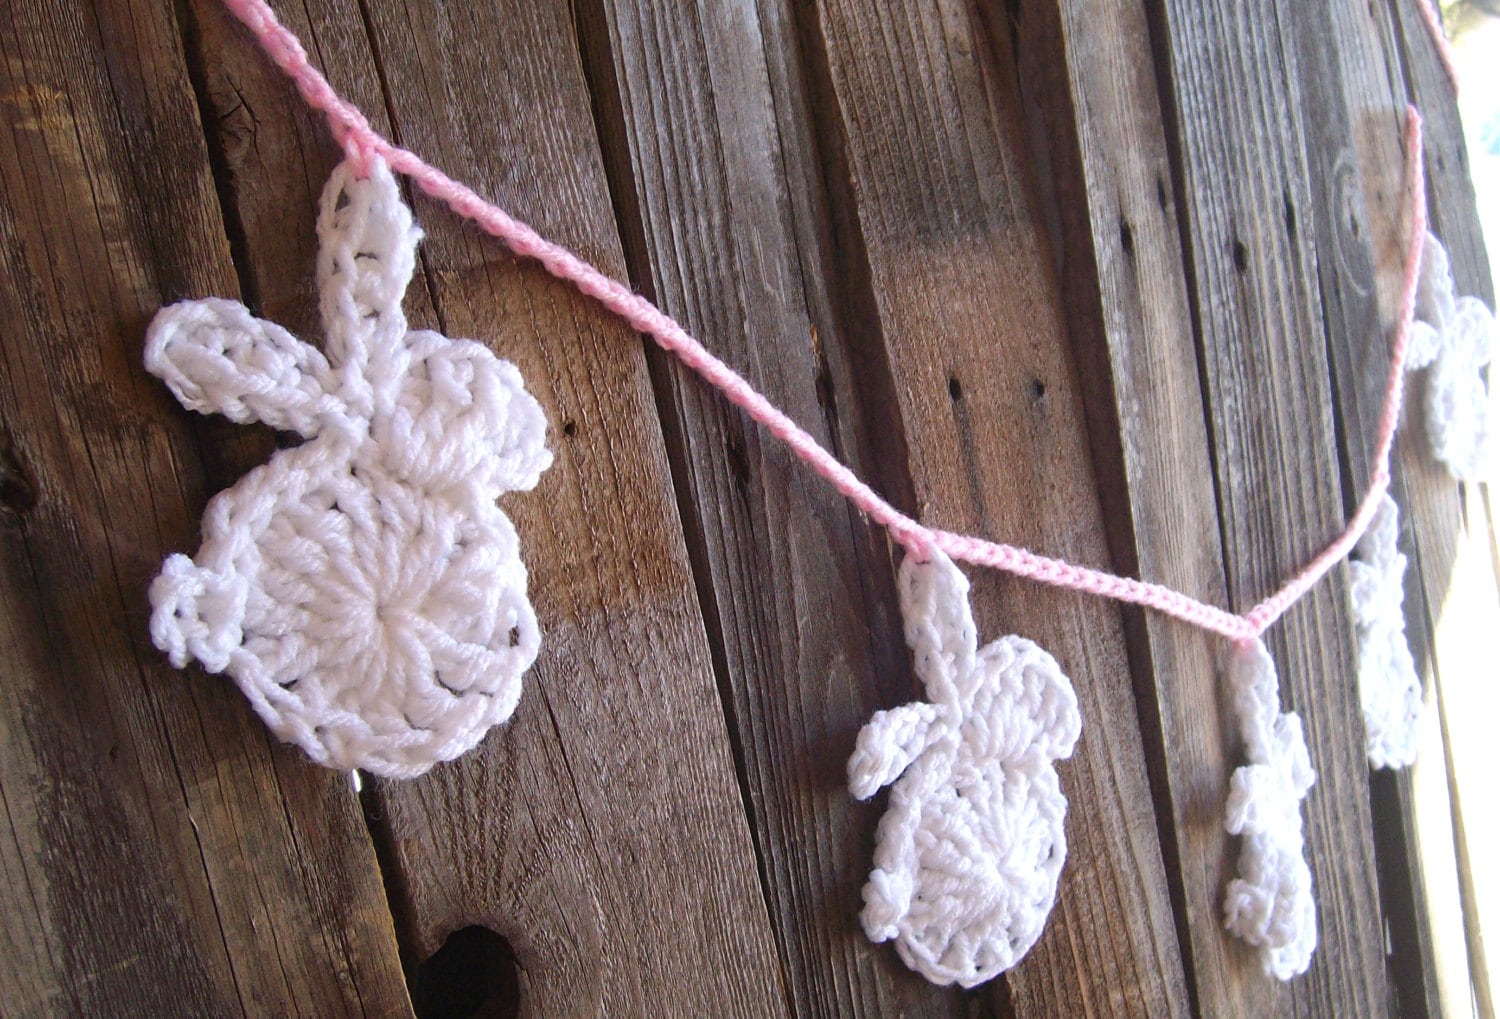
Okay, so I think garlands are super cute and a really simple decoration that can go anywhere! Here is a round up of some of my favorite Easter garlands across the internet!


Easter Spring flowers
http://sarahndipities.blogspot.com/2011/03/how-to-tuesday-free-crocheted-flower.html

Easter Eggs
http://www.skiptomylou.org/2014/03/27/crochet-easter-egg-garland/

 
Easter Bunny
https://www.etsy.com/listing/124959544/easter-bunny-garland-crochet-bunny

This one didn't have a free pattern, so I found one you can use to make a similar garland: http://weaverbirdie.blogspot.com.es/2012/04/cute-bunny-applique.html


Easter Peeps


This one ALSO didn't have a free pattern, so I found one you can use to make a similar garland:
Or one from my blog
 
 
ENJOY!


Thursday, October 10, 2013

Minion Hats

I know these things are on the RAGE right now. Who can deny the fact that those little minions are cute! No wonder everyone is making cupcakes, cakes, hats, costumes, etc. in honor of these adorable little creatures!

My friend asked me to make minion beanies for her- her husband is going to dress up as Gru, and any little kids that want to join in the costume just need to dress up as a minion! Cute idea, right?

Here is what I came up with (photo taken before I added hair). Hopefully I'll get a photo of them on the cute models I made them for!

Friday, December 2, 2011

Mini Snow Angel Christmas Ornament

Materials:
Worsted weight yarn
Size G crochet hook
Yarn needle

Gauge:
Not essential, but using materials listed, angel will measure 3 inches tall

Pattern:
Round 1: In magic ring, sc 6. Do not join, work in rounds (6)
Round 2: 2 Sc in each sc around (12)
Round 3-4: Sc in each sc around (12)
Round 5: (Sc dec, sc in next st) around (8)
Stuff head.
Round 6: Sc dec around (4)
Round 7: 2 sc in each st around (8)
Round 8: (sc in next st, 2 sc in next st) around (12)
Round 9: (sc in next 2 sts, 2 sc in next st) around (16)
Round 10-11: Sc around (16)
Round 12: (sc in next 3 sts, 2 sc in next st) around (20)
Round 13-15: Sc around (20)

Wings:
Row 1: In magic ring, dc 12. Do not join, turn.
Row 2: ch 3, (dc in next st, 2 dc in next st) across
Finish off by sc across the top (down the posts of the dc)

Tie or glue wings to the back of the snow angel.
Yay!

Thursday, December 1, 2011

Mini Snowman Christmas Ornament

These little guys are SO CUTE!! They're probably the smallest snowman you can make out of worsted weight yarn (and I used Red Heart Super Saver Yarn on these guys), at 3 inches tall! Decorate your tree or give them as gifts!

*Disclosure: This post may contain affiliate links. If you purchase an item through one of the links on this site, I may receive a small percentage of that sale. See my full disclosure policy. Thank you for helping support this blog!


Materials:
Worsted weight yarn
Size G crochet hook
Yarn needle
2 beads for eyes
3 inches orange yarn

Gauge:
Not essential, but using materials listed, snowman will measure 3 inches tall

Pattern:
Round 1: In magic ring, sc 6. Do not join, work in rounds (6)
Round 2: 2 sc in each sc around (12)
Round 3-4: sc in each sc around (12)
Round 5: (sc dec, sc in next st) around (8)
Stuff head
Round 6: (sc dec, sc in next 2 sts) around (6)
Round 7: 2 sc in each st around (12)
Round 8: (sc in next st, 2 sc in next st) around (18)
Round 9-13: Sc around (18)
Round 14: (sc dec, sc in next st) around (12)
Stuff snowman.
Round 15: sc dec around (6)

Leaving long tail, weave opening at bottom closed.
Scarf:
Ch 26
Row 1: Sc in 2nd ch from hk, sc across (25 sc)
Stitch in place

Hat:
Round 1: In magic ring, sc 6. Do not join, work in rounds (6)
Round 2: 2 sc in each sc around (12)
Round 3-6: sc in each sc around (12)
Stitch in place (tilt it so that the back part of the hat is touching the back of the scarf, allowing a small portion of face to show.)

Eyes:
After securing hat and scarf, carefully stitch eyes onto face.

Nose:
Tie the orange string into a knot, but do not pull it completely tight. Then stitch the knot onto the face, tying an additional knot on top to keep it in place.

Thursday, October 7, 2010

Crochet Fall Pumpkin or Halloween Jack-O-Lantern


Before I design a pattern, I always take a look at what is out there. When looking up pumpkin crochet patterns, I decided the best one was located at Planet June's site. However, I am never satisfied with patterns, and always have to adjust patterns to my own liking. Here is my version:


This pumpkin is worked as a (sort of) rectangle, which is then stitched together to make a pumpkin.  This version of the pattern ends up being about 2.5 inches wide, and 2 inches tall (including stem) using worsted weight yarn and size E hook.

ALL stitches are worked in the BACKLOOP!!

Leaving a long tail, Ch 13.
Row 1:  Sc in 2nd ch from hk, sc in next 2 sts, hdc in next st, dc in next 4 sts, hdc in next st, sc in last 3 sts. Ch 1, turn.
Row 2:  Sc in 2nd ch from hk, hdc in next st, dc in next 8 sts, hdc in next st, sc in last st. Ch 1, turn.
Repeat rows 1 and 2 eight times, (you should have completed rows 1 and 2 nine times) and fasten off.

When you have finished, take the starting chain's tail to stitch the ends together, the starting chain to your last worked row. Then stitch the side closest to that thread closed. The trick is to only stitch to the "bump" part of the ridges. I'll post a picture up of what I mean when I make my next pumpkin. Circle the side a few times, so that when you pull it tightly, it is closed. You will pull the thread through to the top to tie a knot later. 

Now is the time to stuff the pumpkin and put in any bead decorations. Then take the thread from fastening off the last row, and stitch the top of the pumpkin in the same manner described for the bottom. Once you are finished, pull one of the remaining threads through the pumpkin to the other end to tie a knot. Don't worry, the stem will cover this knot.

To make the stem: (no longer need to work in back loop only)
ch 4 and sl st to form ring.
Row 1:  Sc 5 in loop. sl st with first sc. Ch 1.
Row 2-4: Sc in each ch. sl st with first sc. Ch 1. (You may do additional rows to increase the length of the stem)
Row 5: (sc, ch 2, sc) in each sc, the last one ending with a sl st. Fasten off.

Now stitch the stem to the pumpkin to finish your masterpiece!

Here is a photo of my Jack-O-Lantern:

Tuesday, October 5, 2010

Halloween Amigurumi Cat


This spooky little cat makes a cute holiday decoration, or even a toy for a little one.
This cat works out to be 4 inches tall (almost 4.5 with ears) in worsted weight yarn and size F hook.

Cat is worked in rounds. Make ears first!

EARS (make 2)
Ch 3, sc in 2nd ch from hk, hdc in 3rd ch from hk. Fasten off. Stitch to head before filling. 

CAT
Row 1:  Row 1:  ch 4, sl st to form loop  (6)
Row 2:  2 sc in each st   (12)
Row 3:  sc in each st around  (12)
Row 4:  1 sc, 2 sc in next st, repeat around  (18)
Row 5:  sc in each st around (18)
Row 6:  sc2tog, sc in next st, repeat around (12)
Row 7:  sc2tog, sc in next st, repeat around (8)
Stitch in eyes (and other features as desired), stuff the head
Row 8:  sc2tog 3 more times (5)
Row 9:  2 sc in each st (10)
Row 10:  1 sc, 2sc in next st, repeat around (15)
Row 11:  sc in each st around (15)
Row 12:  2 sc, sc in next 2 sts, repeat around (18)
Row 13:  sc in each st around (18)
Row 14:  2 sc, sc in next 5 sts, repeat around (21)
Row 15:  sc in each st around (21)
Row 16:  2 sc, sc in next 6 sts, repeat around (24)
Row 17:  sc in each st around, BACKLOOP (24)
Row 18:  dc3tog around. fill body before doing last one.
Fasten off, use yarn to stitch remaining hole, and bring out the back and ch 12 to make tail.