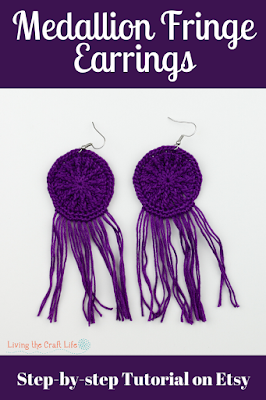
Anyway, here I have for you is a LOVELY Medallion Fringe earring. Coming up with a name for each design is also hard. I love the texture of this design and felt like the mustard one looked like a golden medallion! I hope you will love this gorgeous design.

These look so nice in any color, but I've found that bright colors really showcase the design a lot better!

*Disclosure: This post may contain affiliate links. If you purchase an item through one of the links on this site, I may receive a small percentage of that sale at no additional cost to you. See my full disclosure policy.Thank you for helping support this blog!
20 yards Crochet Thread size 10 (This is a great brand for cotton thread!)
OR
Size 4 (2mm) Crochet Hook (I highly recommend this set!)
3 Skeins (8 yds each) Embroidery Floss (This is a great deal on bulk floss!)
Sewing needle (Blunt ended needles are a MUST HAVE!)
Earring findings (Here's a great starter kit!)
Round Nose Pliers (I highly recommend this kind of pliers when working with earring findings!)
Special Stitches:
Magic Loop
Front Post Double Crochet (FPDC)
Gauge:
Works out to be about 1.25" wide using the cotton thread, 1.5" using embroidery thread.

(Make two)
Row 1: In
a Magic Circle (or Magic Loop), ch 3 (counts as one DC), and dc 11 into the
Magic Loop. Sl St into the top of the turning chain. (12 stitches)
Row 2: Ch
3 (counts as one DC), FPDC around the DC beneath chain-3, *DC in
the next st, FPDC around the same st. Repeat from * around. Sl
St into the top of the chain-3. Each DC from row 1 will have a DC and a FPDC. (24 stitches)
Row 3: Ch
3 (counts as one DC), *2 FPDC around the FPDC from the previous row, DC in the next st. Repeat from * around. Sl St into the
top of the chain-3. (36 stitches)
Row 4: Ch
1, *1 sc in the first two sts, 2 sc in the next st (should be between the two FPDC of the previous row), repeat
from * around, and then use an invisible finish to fasten
off the work. (48 stitches)
FRINGE:
Cut twelve 5-6" strands of thread/floss. Fold each in half. Using your hook, draw a up a folded strand through the back of a SC to the front of the earring. Then pull the tails through the loop and pull tight. Repeat in eleven adjacent stitches. Trim to desired length.
Attach earring findings to the top directly opposite the center of the fringe, and ENJOY!
NEED a little help?
In my Etsy shop you will find the AD-FREE PRINTABLE version of this pattern with extra photos to help. Also included in the purchase is a step by step tutorial for this design: